purchase-orders
- Home
- purchase-orders
Purchase Orders
Index | Suppliers | Purchase Enquiries | Purchase Orders | Purchase NC Reports | GRN | Purchase Invoices
Purchase Order List
Index | Suppliers | Purchase Enquiries | Purchase Orders | Purchase NC Reports | GRN | Purchase Invoices
Purchase Order List
Purchase, Orders. The purchase orders screen lists all purchase orders. The list can be filtered by using the options available on the filter bar, above the list. The displayed list can also be customised, see list views. The toolbar, above the orders list has a number of buttons:
- Add. Use this to create a new purchase order.
- Record. Click on an existing purchase order in the list view to select it and use this button to edit the purchase order.
- Copy. To create a new purchase order that is a copy of an existing one, select the order to be copied before using this button.
- Delivery. When goods ordered on a particular purchase order are received, they can be booked in by entering the details on the delivery / goods received note (GRN) that accompanies the delivery. Use this button to create a goods received note that is based on the selected purchase order which can then be amended to record any differences on the GRN.
- Print. Print one or more selected purchase orders.

Index | Suppliers | Purchase Enquiries | Purchase Orders | Purchase NC Reports | GRN | Purchase Invoices
Purchase Order
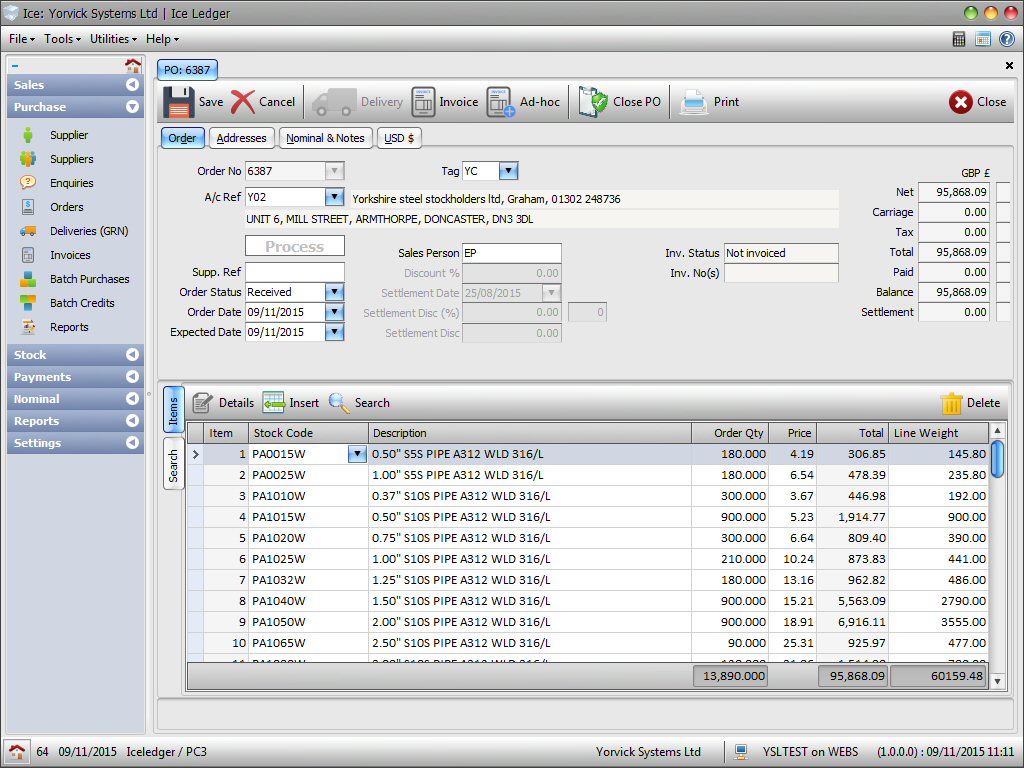
The purchase order (PO) screenshot, below shows that there are 3 buttons on the top toolbar:
The header section has 4 tabs: Order, Addresses, Nominal & Notes and GBP £. The actual order item details are entered in the lower half of the screen in the list view.
| |||
 | |||
| Tool Bar | |||
|---|---|---|---|
Buttons on the top tool bar include:
| |||
 | |||
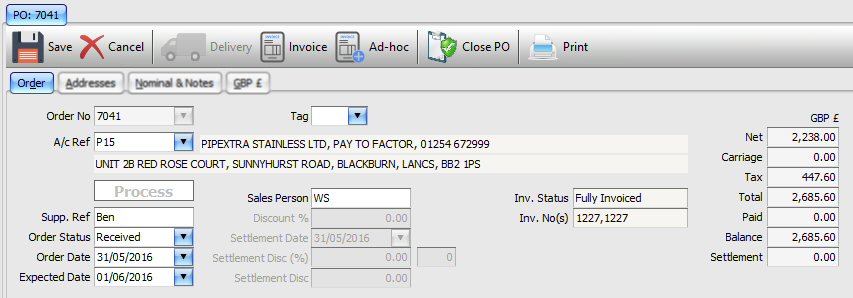
| Order tab | |||
| The following details can be entered into the header section: | |||
| Order No | This is a unique purchase order number assigned automatically to new orders by the system. | ||
| Status | The order status can be set to one of the following:
| ||
| Order Date | Date the order is created. | ||
| Required Date | Date the items are required by. | ||
| A/C Ref | Supplier account reference. Supplier details are displayed to the right automatically when you move away from this field. | ||
| Supp Ref | Supplier reference. Any relevant reference such as a contact name. | ||
| Discount % | Percentage discount. [N.B. To use the discount related fields, Enable Discounts setting, in Purchase section of Configurations]. If the supplier has a published price list and offers you a set discount then you can enter the discount level here and enter items cost price from the supplier list price. | ||
| Settlement Date | If the supplier offers a discount for early payment then you can enter the early settlement cut off date. | ||
| Settlement Disc (%) | Enter any early payment discount offered by the supplier. | ||
| Settlement Disc | If a settlement discount percentage has been entered then the system will display the early settlement amount. | ||
| Summary Details | The system displays a number of summary figures to the right. | ||
Addresses tab | |||
 | |||
| Supplier | Supplier company name and address is listed on the left and may be amended. If there are multiple addresses listed in the supplier record, then these are available for selection from the Select Address drop down list. | ||
| Courier | If you know which courier the supplier will be using to ship the goods then you can enter the details here. | ||
| Consignment Ref | Enter any courier consignemnt reference you may have been given by the supplier to track the delivery process. | ||
| Delivery Address | This is your company address where the items should be delivered to. If you have multiple addresses setup for your company, you can select them from the Select Address drop down list. | ||
| Carriage | Carriage / delivery charge details:
| ||
Nominal & Notes tab | |||
 | |||
| Nominal Code | This is the default nominal code defined in the supplier record settings tab. It is used for any item that does not have a nominal code assigned to it. | ||
| Department | As nominal code, above but for department. | ||
| Tax Code | As the nominal code, above but for tax code. | ||
| Bank Account | This is the bank account that any advance payment, entered below will be taken from. | ||
| Payment Type | Payment on account – advance payment made with purchase order. | ||
| Paid Amount | Actual amount paid in advance. | ||
| Details | A short note to be associated with the advance payment. | ||
| Notes | Three separate notes can be recorded which may be printed on purchase order related documents. The labels for each of the 3 notes (Note 1, Note 2 & Note 3 in the above example) may be set to suite under Configurations. | ||
GBP £ tab | |||
 | |||
| Currency | For foreign currency suppliers, you can view the summary figures in the supplier designated currency. If the exchange rate check box is ticked, the current currency exchange rate is applied and the figured displayed in the company base currency. | ||
Order Items | |||
 | |||
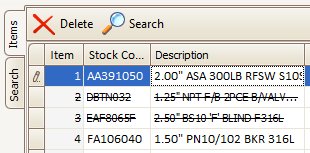
| Here you can enter the items to be place on order and amend the list view to suit, see list views. The section has 3 buttons (Delete, Search and Details) above and 2 tabs (Items and Search) to the left: | |||
| Delete | Use this button to remove any items that have already been entered onto the purchase order but no longer required. A line is put through deleted items and the items removed when the PO is saved. | ||
| Search | Items may be added to the order, one at a time by entering the appropriate stock code and associated details. Alternatively, you can use either the Search button or tab to search the stock items list to locate desired items. When the button / tab are clicked, the items list tool bar changes to reveal the search tool:
You can type any one or more search terms, separated by a space. Whenever the space bar is pressed, the search term is applied to list only matching records. Records where ALL the terms are found in either the stock code reference or the item description are shown. The search is not case sensitive. The number of records found and the total number of records in the stock system are listed to the right of the search box. One or more items may be selected from the list by placing a tick in the check box, at the begining of each line entry and clicking on the Add to Order button, above. Items in the search list that have been added to the order are highlighted. The quantity to be ordered for the selected items is set to the re-order quantity defined in the respective stock item record. To return back to the purchase order items list view, you can either click on the red cross to the far right, on the search bar or the Items tab on the left. | ||
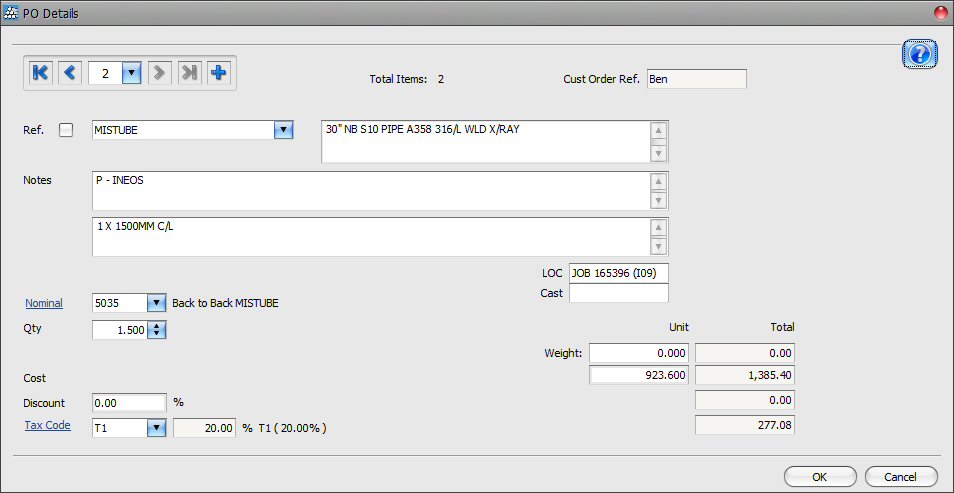
| Details | Majority of the details for an items may be entered in the list view which may be customised to your requirements. If this is still not sufficient, for example when you may want to enter relatively long text notes, you can click the Details button on the tool bar, just above the listed items to display the item details screen for further editing.
| ||


