| Many screens within Ice Ledger display data as a list view, which may be customised to individual user preference. Any changes made to screen display are applied to the currently logged user account and remain in effect between sessions i.e. untill they are changed again. |
| Reset: | To reset the list view back to its original layout, right-click the list and choose Reset Grid Laynot. 
|
|---|
| Column Width: | To adjust the width of a column, move the mouse pointer to the border between column titles till it changes to a double headed horizontal arrow. 
Then click and keep pressed the mouse left button. As you move the mouse left or right, the column width will adjusted. Release the mouse button when the desired column width has been achieved.
You can also adjust the column with of all columns by right-clicking on a column title to display the sub-menu and selecting ‘Best Fit (all columns)’: 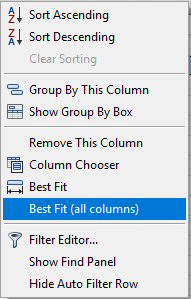
|
|---|
| Column Order: | You can choose the order of the displayed columns. Drag and drop desired column title to the new location till you see 2 arrows, one above and one below the border between columns where you want the selected column to be moved.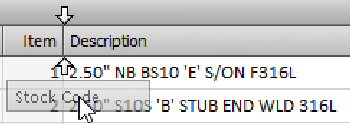 |
|---|
| Displayed Columns: | You can choose which columns should be displayed in the list view. - Display a New Column: Right click any column title and select ‘Column Chooser’ from the menu. A new window, Customization will appear. Locate the column of interest and drag-and-drop the column name between the border of existing columns.
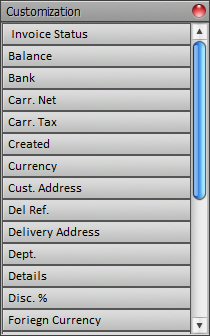 - Remove a Column: Simply right-click the column title and select ‘Remove This Column’ from the displayed menu.
|
|---|
| Select Multiple Rows: | To select a range of consecutive rows, simply click on the 1st row and then, whilst holding down the shift key, click the last row to be selected. You can also hold the control (Ctrl) key and click on individual rows to select / deselect individual rows. |
|---|
| Filtering: | The number of records that are displayed can be filtered (reduced) by right-clicking any column title and selecting ‘Show Auto Filter Row’. A blank row will appear at the very top of the list, just below the column titles. As you type information in to the blank cells of this row, the data is filtered to display only matching rows. You may enter details in more than one column.To hide the filter bar, right-click any column title and choose ‘Hide Auto Filter Row’. You will also notice that a feint new Filter Edit tool bar has appeared at the bottom of the list with details of the filter condition that has been applied. 
To clear the filter condition, simply click on the red cross on the left. To apply a more advance filter, click on the Edit Filter button, on the right. You can also use the quick filter function to select matching rows. When you move the mouse pointer over a column title, you will notice a tiny symbol, resembling a funnel in the top right corner. Click on this symbol to view a unique list of values for the appropriate column. The list will be filtered to display only matching rows. You may repeat this process with other colums to further reduce the number of rows that are displayed. 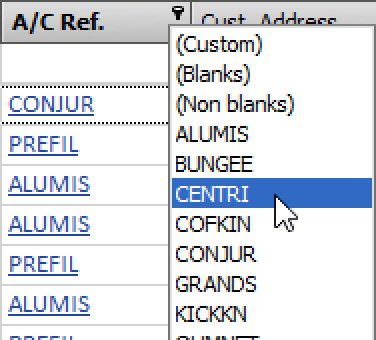
|
|---|
| Find: | You can search the data list for specific information. Right click any column title and select ‘Show Find Panel’ to display the find tool bar, above the list view. Simply enter the text you wish to search for and click the Find button. Click the small red cross, on the left to hide the Find toolbar. |
|---|
| Grouping: | Items in a list can be grouped in to common record sets. For example, in Sales Invoice list view, the invoices can be grouped together by the customer account reference.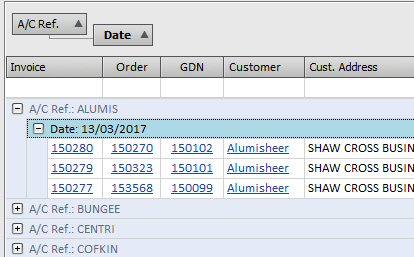 That is, the list will now only display a single record per account reference. Each individual record can be expanded to view the individual invoices within the ‘group’. To group a list, right-click the column title and select ‘Group By This Column’. You can add sub-groups by simply repeating this process with other columns. To clear the grouping, right-click the grouping tool bar, above the list view and select ‘Clear Grouping’.To hide the Grouping Box, select the ‘Hide Group By Box’. 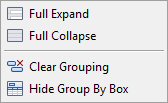
|
|---|
| Sorting: | The list can be sorted on any column. Simply click on the column title. A small triangle will appear to the right to indicate that the list has been sorted on the appropriate column. If you click on the column title for the second time, the direction of the triangle (pointing up / down) will change, indicating that the sort order has been changed (from asending / decending). To clear all sorting, right-click any column title and select ‘Clear Sorting’. |
|---|


