printing
- Home
- printing
Ice Ledger
Print Dialogue
Printing
Whenever you select a document or a report to print, you will be presented with the print dialogue screen:
The various options give you the ability to send the report / document output to a printer, file, email or screen. Depending on the selected output, different options are enabled / disabled. A brief explaination of these are listed below.
| Report Types | Depending on the print option that was selected (Sales Order in this case), the print dialogue screen will present one or more appropriate types of reports that can be selected. In this particular instance, there are 4 different type of reports (Del Note – Allocated Qty, Pickling List, Sales Order and Del Note – Shipped Qty) that may be printed. Select the desired report type. If the same report has been run before, then previously selected options will be restored automatically. |
|---|---|
| Template | For any given report type, you can create multiple templates using the report designer in reports. If not already selected, choose the desired template from the drop-down templates list box. The templates that are available depend on the report type selected, above. |
| Output | You can direct your documents and reports to:
|
| Printer | This is enabled when the printer output option is selected. You can select any printer that is installed on your computer from the drop-down list of printers. |
| Copies | Select the number of copies of each report you wish to print. |
| Printer Properties | When printing, you will have the option to set / change printer properties. |
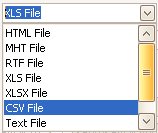
| File Type | When exporting the data to a file, you will be able to select the file type: |
| Folder | If you select a file related output option, then you can select the folder where the file should be created. The button to the right of the folder option allows you to browse the file system to select an existing folder. |
| File Names | For printing a single or a very small number of documents, you may wish to enter the file name for each document that is produced. This option become impractical when printing a large number of documents. To this end, you can select the default option to get the system to generate files name automatically. How the file names are created can be defined in system settings. |
| Email Template | Select the desired template for creating the covering emails. The documents are created as PDF files and sent as attachments to emails. |
| Reprint | If a document has been printed before and is selected again for printing in a batch print run, then it will be ignored unless this option is selected. This option is ignored when printing single documents. |
| Overwrite | When creating files, if you wish to overwrite existing files with the same file name then check this box. |
| Email To | Reports are generally emailed to the email address specified in the customer / supplier account. However, you can selct this option to specify an email address. |
| Close Sales Orders List | This option varies depending on where the printing dialogue is activated. Furthermore, it is visible only when the next option, Close After Printing is checked. If this option is checked then after the printing has concluded, the print dialogue screen is closed and the previous screen (Sales Orders List, in this example) is also closed. |
| Close After Printing | If this option is ticked, the print dialogue screen is closed automatically after printing. |
| Test | Before comencing a large test run, you may wish to produce a single test print using this option. |
| OK | Start the report printing process. |
| Cancel | Close the print dialogue screen. |


