
Stock Take By Location
- Home
- Stock Take By Location
This screen can be used to enter actual current stock levels during stock take and the system will make the necessary adjustment. A combination of options allow Stock items to be retreived by location or stock codes, as described below.
Before you Begin
Before you can start the stock take process, you have to click the button, Initialise Stock Take in Settings, Configurations, Stock. This action creates a copy list of all bins / batches that have some stock still remaining. These can then be stock checked. If any new stock records are created, after this initialiasation process, then these will not appear in the stock list, mentioned below. To add these new items, re-vist the stock configuration screen, click the button, Reinitialise Stock Take, which is only available after the button, Initialise Stock Take has been clicked.

Stocked Items
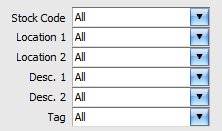
Stock Take allows you to identify stocked items that are stored in particular location(s) and carry out the stock check process on these items. You can identify stocked items in a particular storage location by a number of separate criteria. For each of the 6 selection parameters, you can apply a number of filters, using the drop-down list. Stocked items that fullfill ALL the criteria entered are listed on screen:

| Field | Details | |
|---|---|---|
| Stock Code | You can enter one or a range of stock codes to be listed. | |
| Location 1 / 2 | To allow a more complex filtering of storage location references, the system allows you to apply two separate but different filters for the item location. | |
| Desc. 1 / 2 | Similar to the item location, you can apply 2 separate filters to the item description. | |
| Tag | You can limit your results by the item batch purchase references / tags. | |
| Stock Take Id | The drop-down list allows you to switch between the current stock take and any previous stock takes. | |
| Ticket No | During Stock Take Mode, selected items are grouped together into batches and each batch assigned a Ticket Number. You can enter a ticket number in this field and click Display to list all items on the respective ticket number for the selected stock take. | |
| Add Depleated | By default, the system only lists items that are in stock. You can use this button to include items for which there is no stock showing. | |
| Display | Use this button to apply the selected filters and to show an updated items list. | |
| Reset | Clears all the selected filters. | |
| Apply Stock Take Ref. | For the selected rows of items, you may enter a reference in this field and click the button with teh 3 dots to set the stock take reference for all selected items. | |
| Checked In By | This is the same as the Apply Stock Take Ref, abobe but for Cecked By column. |
In addition to the above filters, you can also use the filter row, at the top of the items list to further fine tune your selection. (If the filter row is not displayed, right-click any column title and select Show Auto Filter Row c.f. List Views: Filter Row).
Tickets
The stock take process involves creating ‘Tickets’ for a group of items to be stock checked. As alreay mentioned, the list can be filtered using the above options. To create a ticket, select 1 or more items (List Views: Select Multiple Rows) before clicking on the button, Ticket, on the top toolbar. A unique ticket number will be assigned to all the selected items and you will be presented with the option to print the newly created ticket. If you choose not to print or if you want to reprint a ticket at some later point, simply enter the ticket number in the field, Ticket No and click Display to display the ticketed items on the screen. Select 1 or more items on the ticket and click the button, Ticket to print the ticket with all the items on the selected ticket. Any item that has a zero as its Ticket No means that the item in question has not been assigned to any ticket.
During this process, you are not able to post any stock take figures as the system can be used for normal operations i.e. allocate stock to sales orders and ship orders etc.. Once you are ready to carry out your stock take, make sure that there are no sales orders with allocated stock. You can check this easily in the stock list view and filtering / sorting by the column, Allocated Qty. When you are ready to proceed, check the option, Stock Take Mode in Settings, Configurations, Stock.
Once stock take mode has been enabled, you are prevented from allocating stock in sales orders and from shipping sales orders.
Once stock take mode has been enabled, you can record the actual stock take quantities on the printed tickets and enter them into the system:
- Enter the desired ticket number and click Display to list the items, on a given ticket, on screen.
- Enter the stock take quantity for item in the column, Stock Take Quantity. You must also enter the stock take reference in the column, Reference before the items on the ticket can be posted. If the reference is the same for 2 or more items, then you may select these items and enter the reference in the field, Apply Stock Take Ref. and click the button with 3 dots to its right. This process will update the stock take reference for all selected items.
- Once all the items on a ticket have been updated, you can select 1 or more items on the ticket and click the button, Post to post ALL items (whether selected or not) on the selected ticket(s).
- Once a ticket has been posted, the listed items background colour is changed to pale blue.
- If you may want to double-check the stock figures for a sample of items. Retrieve the ticket in question and enter the confirmed / revised stock take quantity in the column, Stock Take Quantity and a reference in the column, Checked By. The latter works in a similar way as the Stock Take Reference for multiple records.
Items List
The identified items are listed in a normal list view that can be sorted, modified or filtered further in the same way as all other list views (see List Views for more details).
List View Columns:
- In Stock. Qty in stock. If there is any stock allocated in a sales order, the background of the cell is set to pink.
Once you have the required items listed, you can update the Stock Take Quantity column with the actual item quantity, for the appropriate item. In addition, you can also enter a short reference to indicate that this particular batch has been stock checked. This is particularly useful when the system quantity matches the physical quantity in stock (i.e. there is no change). Multiple rows may be updated at any one time. If quantity in stock for two or more items are correct and you want to record this stock check, then select the appropriate rows and click the button, Qty OK to update all selected rews. Similarly, if you want to update the Reference field for all the selected rows with the same single reference then simply select the appropriate rows, enter the reference in the Apply Stock Take Ref and click the button to its right. To save any changes that you have made, you MUST click the Save button. When changes are saved, the system automatically records the date and time the changes are applied.