Payments
- Home
- Payments
Payments & Receipts
Index | Customer Receipts | Supplier Payments | Receipts | Payments | Cancel Receipts | Cancel Payments
Menu
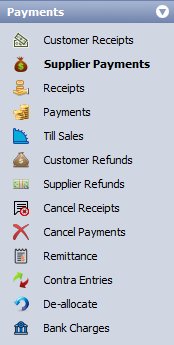
You can manage payments received from account customers & other sources and payments made to suppliers and ancillary purchases of goods and services.
Index | Customer Receipts | Supplier Payments | Receipts | Payments | Cancel Receipts | Cancel Payments
Customer Receipts
You can enter all payments received from customers and match them against sales invoices that have been issued.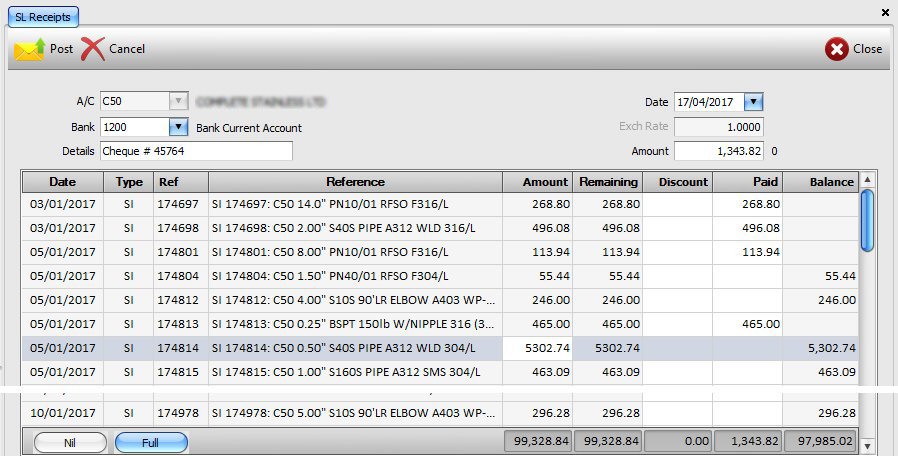
| A/C | Enter the customer account reference or select from the drop-down list. |
|---|---|
| Bank | Select the bank account that the money will be deposited into. In a multi-currency setup, the system will automatically select the first bank account for the customer designated currency. You cannot select a bank account that is not the same currency as the customer account. |
| Details | Enter any relevant details you wish to record against the transaction. |
| Date | Date you wish to recerd against the received payment. |
| Exchange Rate | In multi-currency setup, this is the currently set exchange rate for the foreign currency. For base currency and single-currency setup this will always be 1.0. |
| Amount | Enter the full amount received. Alternatively, you can select individual transactions that are to be marked as paid and the system will automatically set this balance to the correct amount. If there are any sales receipts or sales credits in the list of transactions, then select them first and ‘mark’ them as paid before paying off any sales invoices. |
| Transactions | The system will list all sales invoice, credit notes and pre-payments for the selected customer that are currently outstanding. As with other list views, the information displayed my be customised to suit.
Once you have paid off the required transactions, click the Post button to save all details to the accounst ledger. If there is any outstanding balance (i.e. part received payment that has not been allocated) then you will get a prompt asking to confirm that you want to continue with the un-allocated balance. If you continue, the system will record the outstanding balance as payment on account. |
| Full | You may use this button to mark / pay off the full balance on the currently selected transaction. |
| Nil | Similar to the above, use this button to clear any payments on the currently selected transaction. |
Index | Customer Receipts | Supplier Payments | Receipts | Payments | Cancel Receipts | Cancel Payments
Supplier Payments
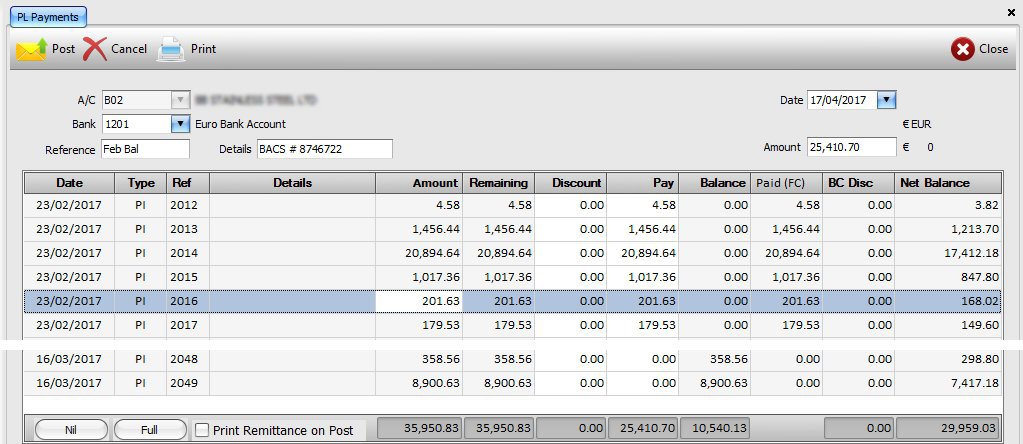
You can enter all supplier payments and match them against purchase invoices. This screen is very similar to the customer receipts, listed above. The transaction list has been customised to display figures in base (BC) and foreign currencies (FC). Should you wish to print a remittance advice note to send to the supplier, simply tick the ‘Print Remittance on Post’ option at the bottom.
Any payments allocated to outstanding invoices are taken from the appropriate currency bank account. For foreign currency payments, the currency exchange rate is set automatically by the system, based on the pervailing exchange rates when the foreign currency funds were purchased (Nominal, Bank Transfer). If the funds are from a multiple currency purchases then the exchange rate is adjusted to reflect the amounts from the different funds.
Index | Customer Receipts | Supplier Payments | Receipts | Payments | Cancel Receipts | Cancel Payments
Receipts
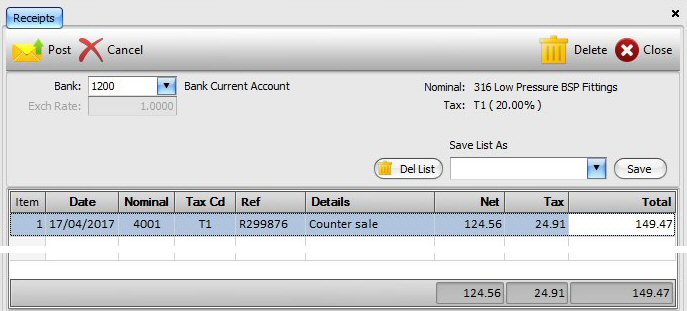
You can enter payments that you have received for goods and services for which you have not created a sales invoice. Select the appropriate bank account and record each payment as a separate transaction. Click the Post button to save entered details. If you receive these payments on a regular basis, say every week, month or quarterly then you can save them to a list and recall them in the future to avoid manual re-entry each time.
Index | Customer Receipts | Supplier Payments | Receipts | Payments | Cancel Receipts | Cancel Payments
Payments
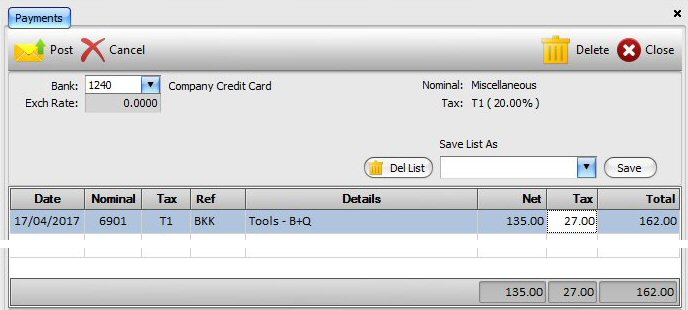
This screen is very similar to the receipts screen, above and allows you to enter expenditure as batch entries for transactions that do not have matching purchase invoices.
Index | Customer Receipts | Supplier Payments | Receipts | Payments | Cancel Receipts | Cancel Payments
Cancel Receipts
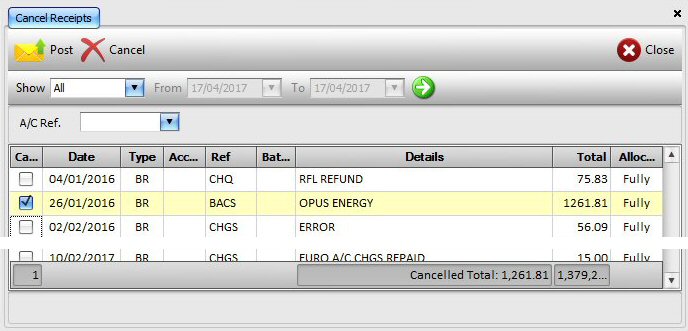
Use this option to cancel any received payments that have been recorded previously. You can choose the date range for which the receipt transactions are listed. Select the one or more tranactions that are to be cancelled by placing a tick in the first column and click the Post button. You can also use the A/C Ref. drop down list to select limit the transactions for a single customer account.
Index | Customer Receipts | Supplier Payments | Receipts | Payments | Cancel Receipts | Cancel Payments
Cancel Payments
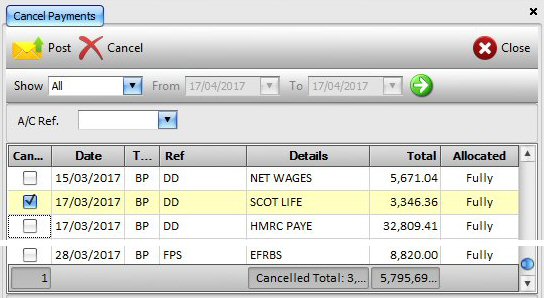
This screen is similar to the cancel receipts, above. Use this screen to cancel any payments that you may have made previously.
Index | Customer Receipts | Supplier Payments | Receipts | Payments | Cancel Receipts | Cancel Payments
Contra Entries
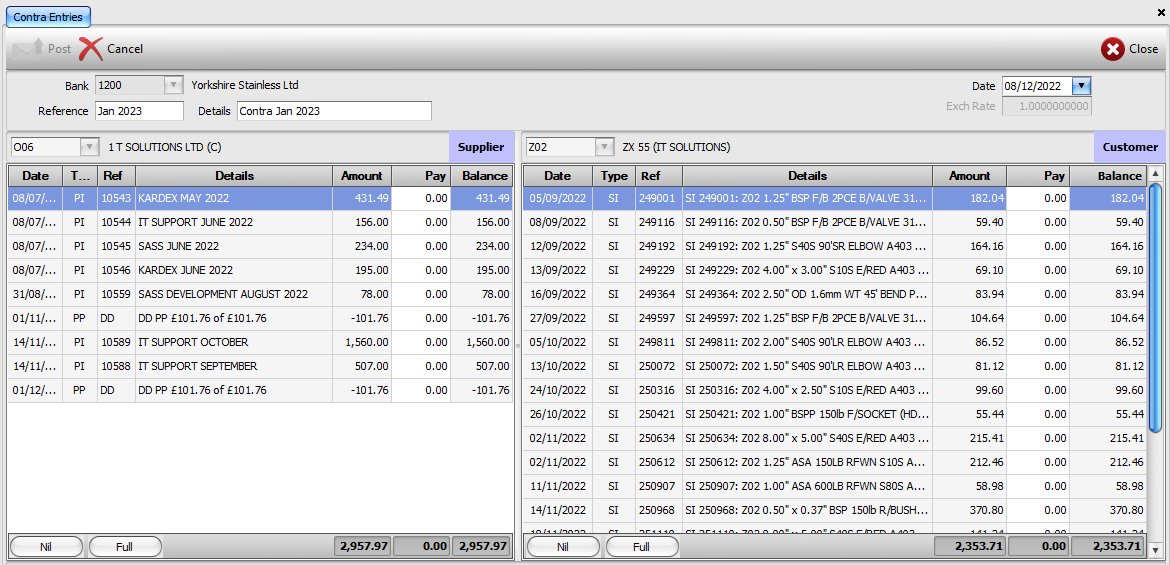
If you buy from and sell goods to a company then you can offset what you owe them by balancing out what they owe you and vice vera.
Index | Customer Receipts | Supplier Payments | Receipts | Payments | Cancel Receipts | Cancel Payments
Remittance
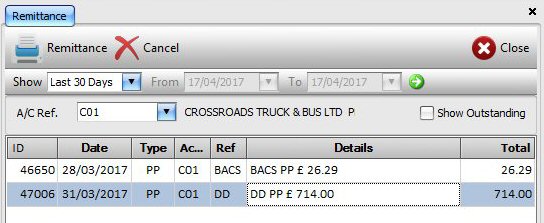
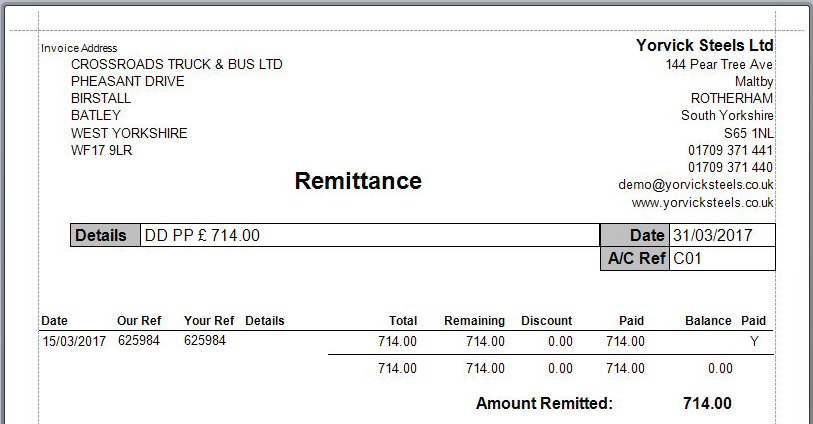
This option allows you to print supplier remittance / advice note. Select the supplier account reference and the date range for which you want to list all payments that you have made to the supplier in question. Select the desired payment transaction, and click the Remittance button to produce the remittance advice note. You can select multiple payments (use combination of shift and control keys with mouse click) to produce multiple individual remittance advice notes. You will be presented with the print dialogue screen from which you can select to print a hard copy or produce a PDF for sending as an email attachment.
Index | Customer Receipts | Supplier Payments | Receipts | Payments | Cancel Receipts | Cancel Payments

