


This document demonstrates how to group a report's data. Note that data grouping can be performed only if a report is bound to a data source.
To group records in a report, do the following.
-
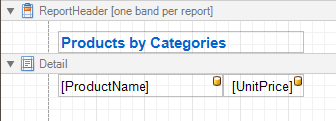
Create a new report and bind it to a data source. In this tutorial, we'll start with the following report.
-
Now, switch to the Group and Sort Panel, and click Add a Group. In the invoked list, choose a data member across which the report is to be grouped. Note that grouping across calculated fields is supported, as well.
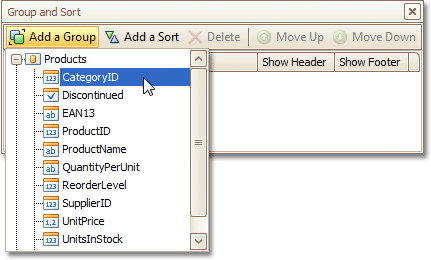
If multiple groups are created, you can specify the priority for each group, by selecting it in the Group and Sort Panel, and using the Move Up and Move Down buttons.
-
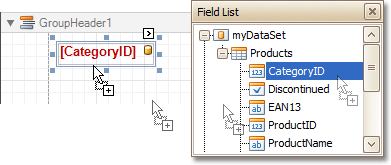
After this, a Group Header band is added to the report, with the specified data member being set as its grouping criterion.
Now, it's only left to drop the corresponding item from the Field List onto this band, so that it's displayed as a header for each group.
If required, you also can apply mail merge to this label.
-
In addition, you can enable the corresponding Group Footer band, by checking the Show Footer option in the Group and Sort Panel.

To manage the sorting order of the group's items (ascending or descending), use the Sort Order drop-down list.
-
Then, you can calculate a total across the group, by placing a Label onto this band, and specifying its Summary properties in the following way.
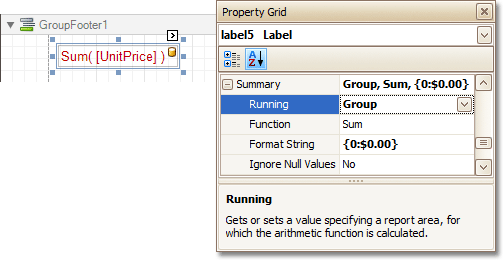
Note also that value formatting is applied to a summary independently of the general formatting, and has a greater priority.
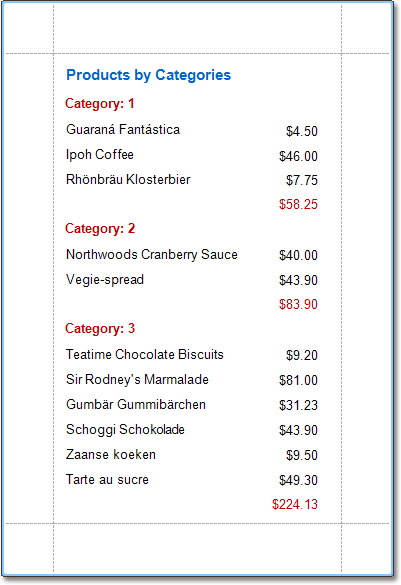
The report is now ready. Switch to the Preview Tab, and view the result.
To learn how groups can be sorted against a summary function result, see Sort Groups by a Summary Function Result.
To learn how page numbers can be added to groups independently from the report's page numbers, refer to Add Page Numbers for Groups.
