This page will guide you through the steps you need to take to get up and running with Ice Ledger right from the installation to creating a new company ready for you to start using the system.
Installing Ice Ledger
Make sure that your system(s) meet at least the following specification and that you have downloaded a copy of Ice Ledger by visiting the Download page.
- MS Windows Vista, 7, 8.x & 10
- Intel Pentium or higher/AMD Equivalent.
- 1GB RAM (2GB or more recommended).
- 250MB+ Free Space (Standalone/Server Installs)
Once you have download the software, follow the steps below to complete the installation:
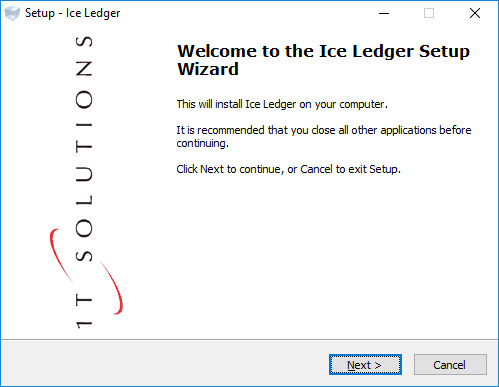
- Browse to the location you download the software to and double click on the file. Unless you have changed this, the file will be called install_iceledger.exe.
- Using your mouse, click on 'Next' to through the wizard, answering the questions as you go through.
- Unless, there is a need to change, it is recommended that you accept the defaults for the Destination Folder etc. This will ensure a smoother installation process.
-
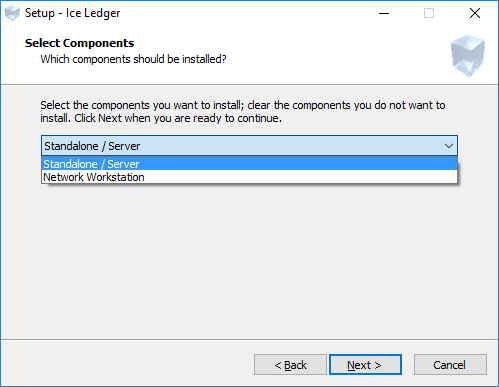
After the Desination Folder screen, you will be asked to select the components you want to install, you will have two choices:
- Standalone/Server. Use this option if you are installing the software on a Single system for a single user, or if you are installing the software on your designated server PC for a multi-user installation.
- Network Workstation. This option allows you install Ice Ledger on a workstation for use in a multi-user install.
-
Select your desired option and click 'Next' to contine, you will eventually reach the Ready to Install screen. This will list the dependencies that will need to be downloaded and installed, along with a list of tasks to be completed.
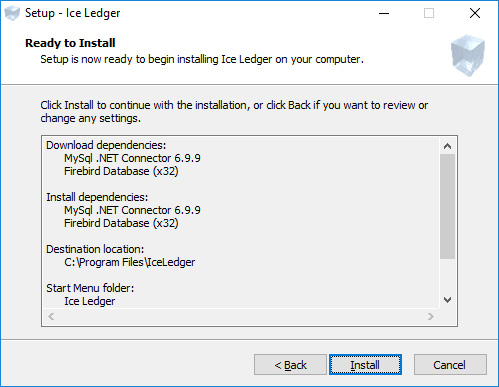
- When your ready, click on 'Install', sit back and let the software install. The installation process, including the installation of all the dependencies, can take some time depending on the dependencies, system and internet speed.
- After the install completes you should see a new icon on your desktop titled 'Ice Ledger' (Icon will be an Ice Cube).
- This completes the installation of the software, which just leaves a small amount of Configuration to be completed which will complete when you run Ice Ledger for the first time.
Running Ice Ledger for the first time.
You've followed the above procedure and installed Ice Ledger, now your ready to run Ice Ledger for the first time. Depending on which install you completed, Standalone/Server or Network Workstation, a small amount of configuration will need to be completed. However this will be done with minimal interaction from yourself. Below is a guide to what to expect for each option.
Standalone/Server
If you have installed the system on a system running Windows 7 or higher, using this option, you will be asked if you want to allow this program to make changes to your PC, this is an extra layer of secuirty added by Microsoft to try and prevent malicious applications from installing themselves on your system, Ice Ledger is safe and free from any malicious code, to complete the configuration, you will need to click 'Yes'.
You will see a Command Window open close quickly, this is nothing to worry about and is just part of the final bits of configuration.
After the above has completed, you should be prompted with the Ice Ledger Login dialog. If that happens then you have successfully installed Ice Ledger and can log into the supplied ficticious company, Yorvic or the demo data.
Network Workstation
When running Ice Ledger for the first time on a Network Installation setup, you will be prompted with a dialog (see image below) asking you to select the server and a drive letter for the Backup Drive.
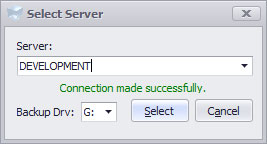
- Server: The name of the server to connect to. This should be set to the name of the PC that you installed the Server edition on. When you select a PC from the list, the system will try and make a connection to the PC to give you an indication that you have the right PC.
- Backup Drv: Select a Drive Letter to be assigned to the share on the server to allow you to backup the data from the workstation.
Create a New Company
Note: This can only be completed from the PC that is designated as the Server if running in a network situation.
So you've installed Ice Ledger, logged in had a play around with the Demo Company, now your ready to get down to buisness and use it for your accounting needs. Well fire up Ice Ledger and login, and we'll get going!
Once your in Ice Ledger, select 'Create a New Company' from the File menu. You should be presented with the New Company Wizard like the image below.
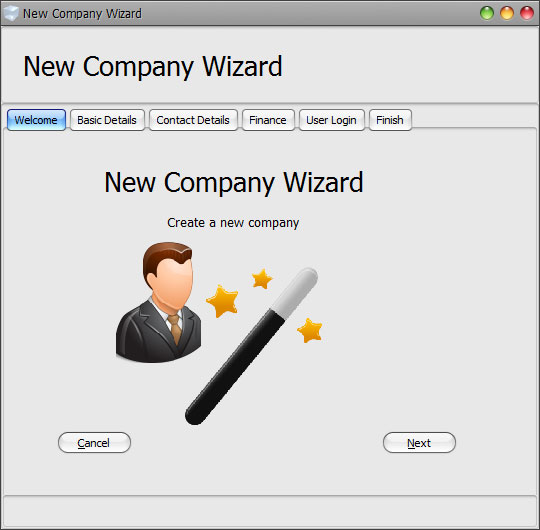
The wizard makes creating a new company easy, simply click 'Next' to forward to the next page after filling out the desired options. Clicking 'Cancel', will as the name suggests, cancel the creation of the new company and closes the Wizard. To go back to the previous page, click 'Back'. Fields highlighted in a red colour are required.
Basic Details
- Co Short Name. Enter a short string that represents your company or the company name, for example, if your company is called Acorn Containers Ltd, we could use 'ACORN' as the Short Name. (Required)
- Company Name. Enter your full Company Name. (Required)
- Contact Person. The main contact for your company or the person responsible for your accounts.
- Address. The full correspondance address for your company. This address will be printed on docuemnts such as Invoices, Orders etc.
- Create new company from backup data file. Enable this option if you want to create the new company from a backup from an existing company.
- Backup File. If the above option is enabled, then enter the name and location of the backup file to use.
Contact Details
- Tel No 1. The main telephone for your company.
- Tel No 2. Any secondary telephone number for your company.
- Fax. Your companies Fax number.
- Email. The main or general purpose email address for your company.
- Website. The url of your company's website.
All of the above can be configured to be printed on documents such as Invoices, Orders, Statements etc.
Finance
- Base Currency. The main operating currency for your company. If your a UK based company, this will proberly be 'Pound Sterling'. (Required)
- Multi Currency. Tick this option if you have customers or suppliers trade in a different currency to that of the selected Base Currency.
- Co Reg No. The Registration Number for your company given by Companies House.
-
VAT Scheme. Select the appropiate VAT scheme that applies to your company. Ice Ledger currently support Standard VAT, Cash Accounting & Flat Rate. If your not VAT registered, select the Not VAT Registered option.
- VAT Regd No. Your VAT Registration Number.
- VAT Regd Date. The date you registered for VAT. This is formation purposes only. If you can't remember, setting this to the current date will not effect the system advertently.
- VAT Obligation Frequency. Select how often you have to submit your VAT Returns.
- Business Type (Only appicable if chosen VAT scheme is Flat Rate). Select the Business Type under which your company falls.
- Applicable VAT Rate (Only appicable if chosen VAT scheme is Flat Rate). Enter the applicable VAT Rate for the selected Business Type.
- First Year (Only appicable if chosen VAT scheme is Flat Rate). Tick this option if your within the first 12 months of been registered for Flat Rate VAT, the applicable rate is reduced by 1. Note that the system will NOT automatically disable this. You will be responsible to ensure that the applicable rate is correctly configured.
- Financial Year. The month and year of your Financial Year.
User Login
- Username. The username for the default login for the new company.
- Password. Enter your desired password for the new user.
- Show Password. Tick this option to view the entered password.
Finish
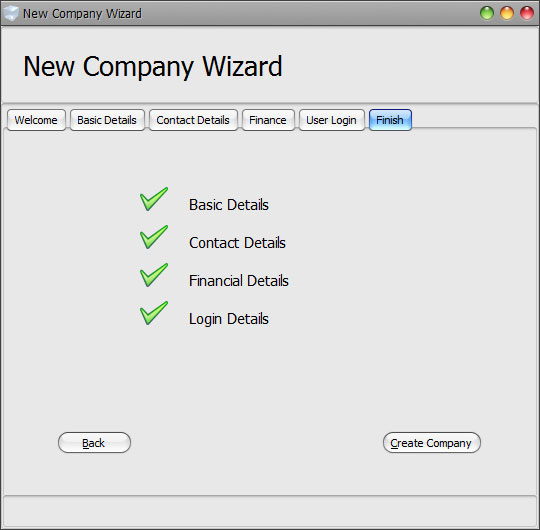
When you have reached this page, if you have entered all the details required you should see 4 green ticks, and the 'Create Company' button should be enabled, this indicates all details entered are valid and we can proceed to create the company. If you see any red crosses, some of the information is incorrect and you'll need to go back to the approiate tab and fix the issue.
Once you are happy to proceed, click on 'Create Company' button to create the new company. After a short delay, you will get a dialog confirming the company has been created. To use the new Company, you will need to logout from Ice Ledger and select the new Company from the Company selection field.
Create a new User
You have now created your new Company and have a single login, however if you want to create additional user login accounts for other users, you may do so using the User Access module under Settings on the Main Menu.
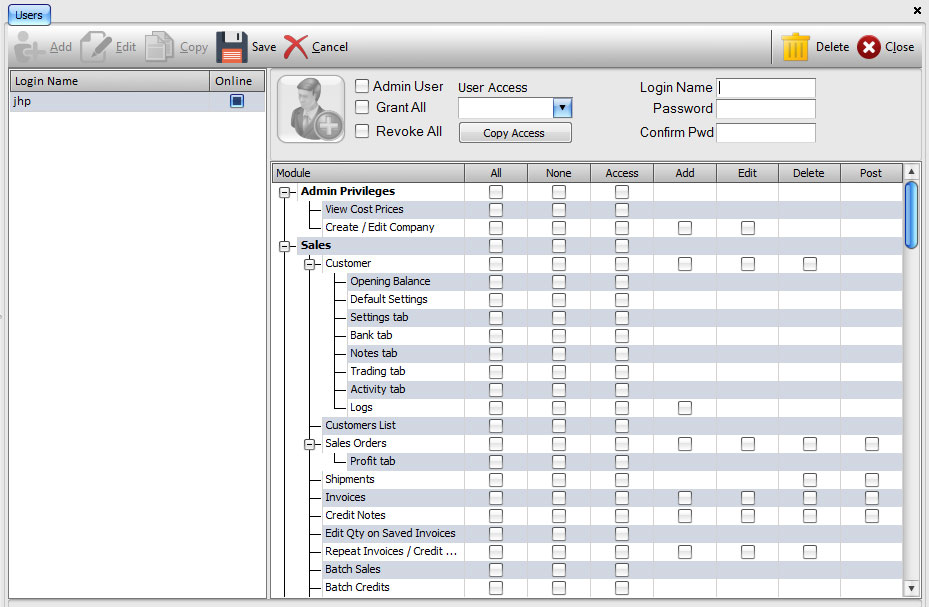
To create a new user, click on the 'Add' button on the toolbar, the main fields and the access listvie will become enabled.
- Enter your choosen username into the Login Name field.
- Enter your choosen password twice, once in the Password field and again to confirm it.
- If you want to grant the user access to all of the modules, tick the 'Grant All' option, alternatively you can revoke all the access rights for the user by ticking the 'Revoke All' option.
- If you want to grant the user access admin rights (this means he can do as he/she pleases), then tick the 'Admin' option.
- You can also give this user the same rights as another user on the system by selecting the user you want to copy under the User Access field and clicking on 'Copy Access'.
For a more detailed look on how to create users or modify their access rights, see User Access help page.
![]()
![]()
![]()
![]()
![]()
![]()