This document describes how to insert page numbers or other system information (e.g. current date and time, user name, etc.) into a report.
Generally, this information is displayed within the Page Header and Footer or Page Margin bands. To add page numbers or system information to a report, locate the Control Toolbox and drag and drop the Page Info control.
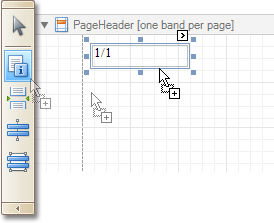
Then, follow the instructions below for your specific task.
 Add Page Numbers
-
Select the Page Info control, click its Smart Tag, and in the invoked actions list, expand the drop-down list for the Page Information entry.
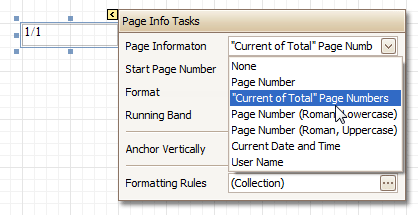
Select whether to display only the page number (Latin or Roman - uppercase or lowercase), or the current page number with total pages.
-
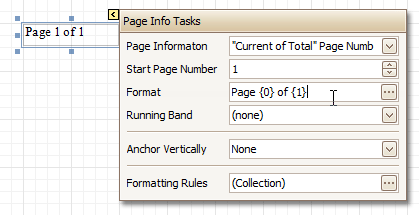
To format the control's text, via its Smart Tag, invoked its actions list, and specify the required format (e.g. Page {0} of {1}).
-
Using the control's actions list, you also can specify the starting page number, and the running band (e.g. this option is available when there are groups in a report, and it's required to apply independent page numbering for them). For details on this, refer to Add Page Numbers for Groups.
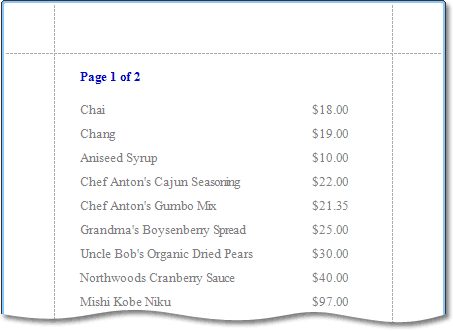
The result is shown below.
 Add System Date and Time
-
Select the Page Info control, click its Smart Tag, and in the invoked actions list, expand the drop-down list for the Page Information entry, and select Current Date and Time.
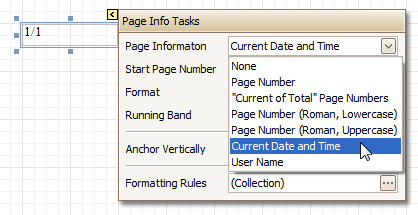
-
To format the control's text, via its Smart Tag, invoked its actions list, and specify the required format. You can either type it in the Format field, or, click its ellipsis button and use the Format String Editor.
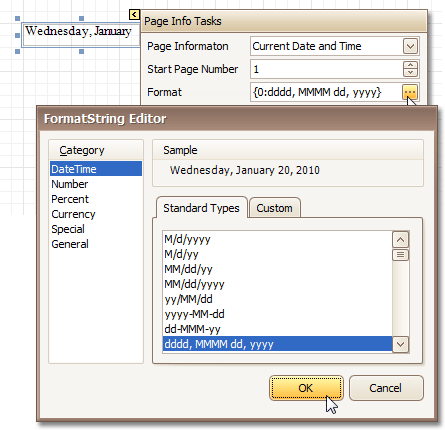
The result is shown below.

 Add the User Name
-
Select the Page Info control, click its Smart Tag, and in the invoked actions list, expand the drop-down list for the Page Information entry, and select User Name.
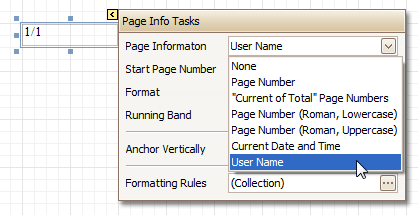
-
To format the control's text, via its Smart Tag, invoke its actions list, and specify the required format (e.g. Current User: {0}).
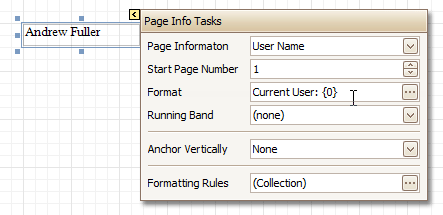
The result is shown below.

 See Also


