Getting Started
- Home
- Getting Started
Getting Started
Running Ice Ledger for the first time.
Welcome to Ice Ledger. To login, select the appropriate company from the Select Company drop-down box and enter your login details. If this is your first time, after installation then you can select the supplied company, Yorvic or the _Demo company and log in as iceledger using iceledger as the password – remember both the user name and passwords are case (UPPER and lower) sensitive.
If you have not already done so, you should watch the short video on YouTube to get a quick overview of the system.
The installation comes ready with the fictitious company Yorvic Systems Ltd, supplying stainless steel pipe and fittings so that you can jump straight into test driving the system without being bogged down in having to setup a new company and system configuration from scratch, before you’ve even had the chance to get familiar with the system.
Demo Company.
In addition to this fictitious company, Yorvic, the system also has a demo company, _Demo. Whenever, you are logged in to another company, you can clone your company by copying the data to this demo company. This is a very useful feature when you are trying to do something that you are not familiar with or confident about. Simply copy the company data to the demo copmpany (Utilities, Copy to Demo Company), Log out of the system and log back into the _Demo company. Because this is now an exact copy of your other company, the login details will be the same as those for the company that you copied. Once you have tested your procedure and are happy to proceed, you can log back in to your actual company and continue with confidence. The demo company is also very useful for training staff because they can work on, what is in effect, real live company data and you can assured of the fact that whetever mistakes or errors are made, they will not affect your actual company data.
Data Backup.
You may think it premature to start talking about backup in this quick getting started guide. The reason for mentioning it is down to it’s great importance. Go to Utilities, Backup Data to backup your company data. You may need to make sure that your system is properly configured for backup. Here’s a short video on the topic.
Create a New Company
Note: In the case of network / multi-user installation, this can only be completed from the computer that is designated as the Server.
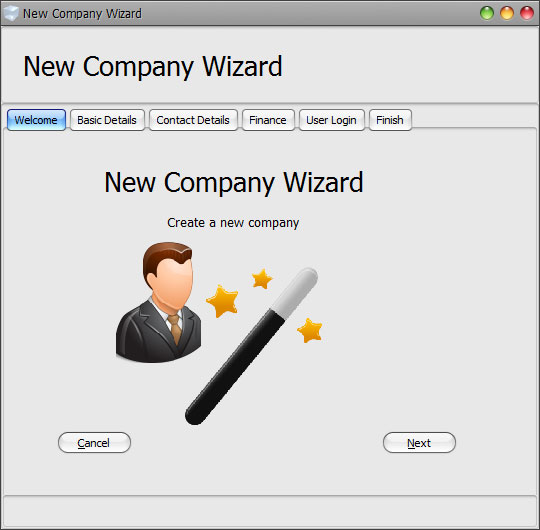
Once you are ready to create your own company, login to Ice Ledger, go to File, Create a New Company. You will be presented with the New Company Wizard, as below.
The wizard makes creating a new company easy, simply click ‘Next’ and follow the on-screen instructions, filling in the required details in each form. To go back to the previous page, click ‘Back’. Fields highlighted in a red colour are mandatory.
Basic Details
- Co Short Name. Enter a short string that represents your company or the company name, for example, if your company is called Acorn Containers Ltd, we could use ‘ACORN’ as the Short Name. (Required)
- Company Name. Enter your full Company Name. (Required)
- Contact Person. The main contact for your company or the person responsible for your accounts.
- Address. The full correspondance address for your company. This address will be printed on docuemnts such as Invoices, Orders etc.
- Create new company from backup data file. Enable this option if you want to create the new company from a backup from an existing company.
- Backup File. If the above option is enabled, then enter the name and location of the backup file to use.
Contact Details
- Tel No 1. The main telephone for your company.
- Tel No 2. Any secondary telephone number for your company.
- Fax. Your companies Fax number.
- Email. The main or general purpose email address for your company.
- Website. The url of your company’s website.
All of the above can be configured to be printed on documents such as Invoices, Orders, Statements etc.
Finance
- Base Currency. The main operating currency for your company. If your a UK based company, this will proberly be ‘Pound Sterling’. (Required)
- Multi Currency. Tick this option if you have customers or suppliers trade in a different currency to that of the selected Base Currency.
- Co Reg No. The Registration Number for your company given by Companies House.
- VAT Scheme. Select the appropiate VAT scheme that applies to your company. Ice Ledger currently support Standard VAT, Cash Accounting & Flat Rate. If your not VAT registered, select the Not VAT Registered option.
- VAT Regd No. Your VAT Registration Number.
- VAT Regd Date. The date you registered for VAT. This is formation purposes only. If you can’t remember, setting this to the current date will not effect the system advertently.
- VAT Obligation Frequency. Select how often you have to submit your VAT Returns.
- Business Type (Only appicable if chosen VAT scheme is Flat Rate). Select the Business Type under which your company falls.
- Applicable VAT Rate (Only appicable if chosen VAT scheme is Flat Rate). Enter the applicable VAT Rate for the selected Business Type.
- First Year (Only appicable if chosen VAT scheme is Flat Rate). Tick this option if your within the first 12 months of been registered for Flat Rate VAT, the applicable rate is reduced by 1. Note that the system will NOT automatically disable this. You will be responsible to ensure that the applicable rate is correctly configured.
- Financial Year. The month and year of your Financial Year.
User Login
- Username. The username for the default login for the new company.
- Password. Enter your desired password for the new user.
- Show Password. Tick this option to view the entered password.
Finish
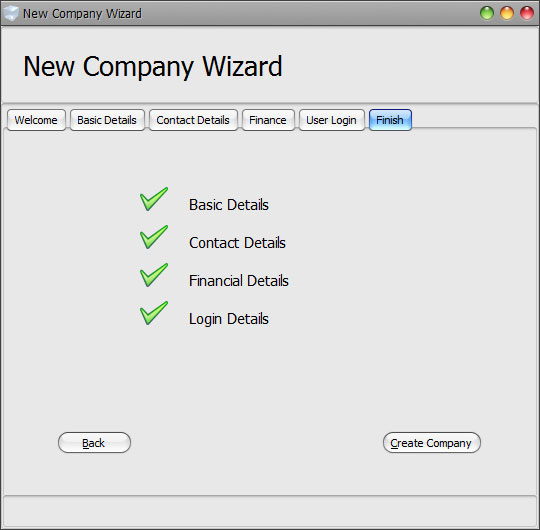
When you have reached this page, if you have entered all the details required you should see 4 green ticks, and the ‘Create Company’ button should be enabled, this indicates all details entered are valid and we can proceed to create the company. If you see any red crosses, some of the information is incorrect and you’ll need to go back to the approiate tab and fix the issue.
Once you are happy to proceed, click on ‘Create Company’ button to create the new company. After a short delay, you will get a dialog confirming the company has been created. To use the new Company, you will need to logout from Ice Ledger and select the new Company from the Company selection field.
Create a new User
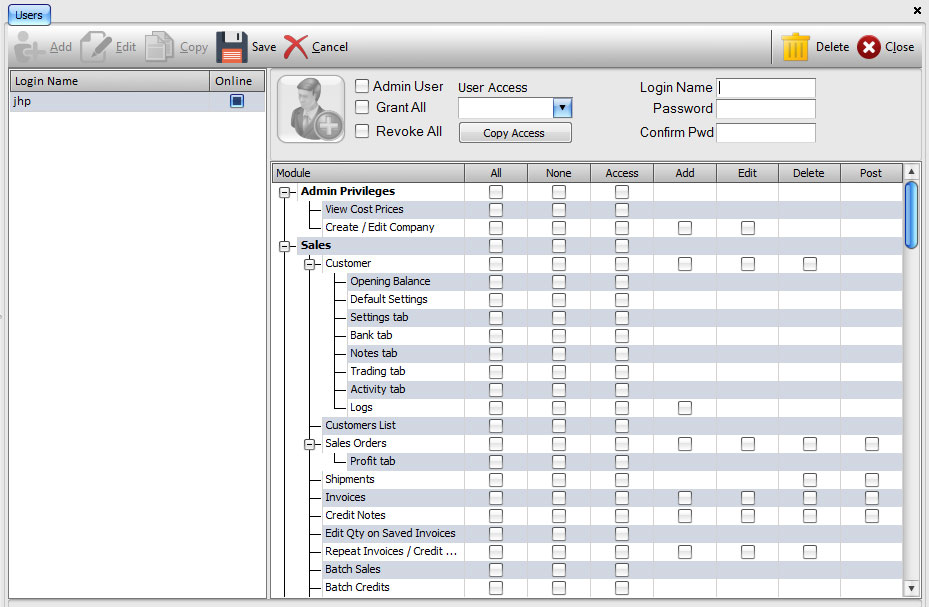
Once you have created your new Company, you will have a single login account. If you want to create additional user login accounts for other users; go to Settings, User Access.
To create a new user, click on the ‘Add’ button on the toolbar, the main fields and the access listvie will become enabled.
- Enter your choosen username into the Login Name field.
- Enter your choosen password twice, once in the Password field and again to confirm it.
- If you want to grant the user access to all of the modules, tick the ‘Grant All’ option, alternatively you can revoke all the access rights for the user by ticking the ‘Revoke All’ option.
- If you want to grant the user access admin rights (this means he can do as he/she pleases), then tick the ‘Admin’ option.
- You can also give this user the same rights as another user on the system by selecting the user you want to copy under the User Access field and clicking on ‘Copy Access’.
For a more detailed look on how to create users or modify their access rights, see User Access help page. You can create an many users as you wish. The number of users that can log in at the same time is determined by your license agreement.


